There are several ways to install PostgreSQL on macOS and in this tutorial, you'll learn the easy way.
Method 1: Installing PostgreSQL via DBngin
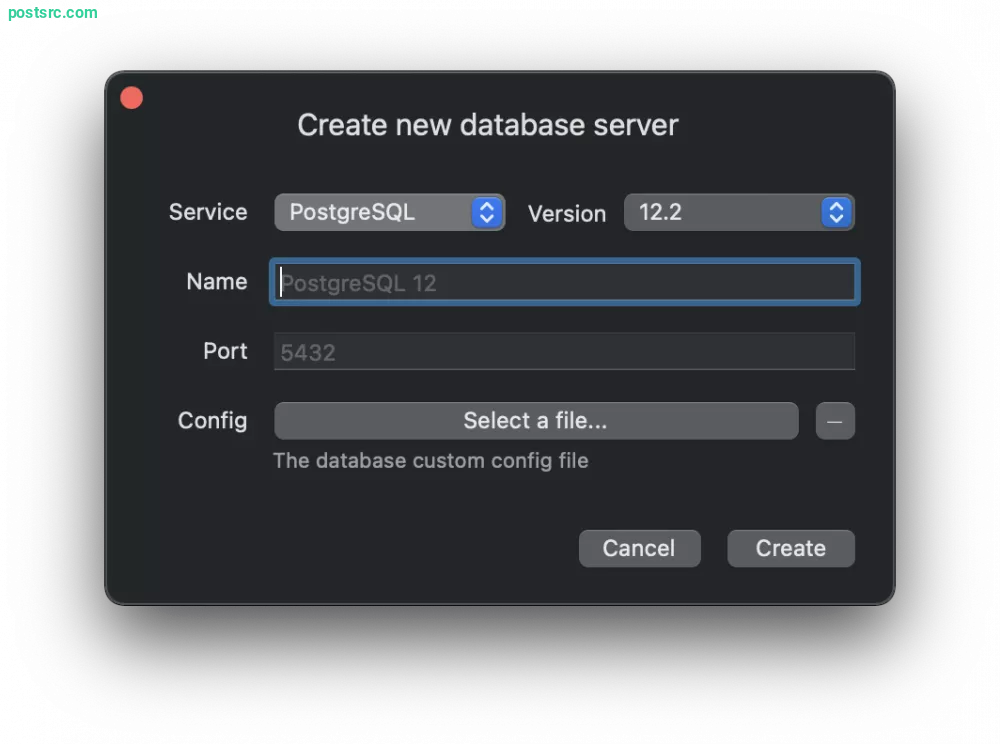
The first way is to install it using DBngin and it's a free all-in-one database version management tool that comes with other databases as well such as MySQL and Redis. Under the hood, it's using Homebrew and the setup process is very simple. DBngin comes with a very simple GUI and anything from creating, starting, and stopping the database server can be done with a simple one-click button.DBngin InterfaceTo create a new database simply press the + button and fill in the details required.DBngin Create new Database What makes it special is the simple interface, simple database versioning, one press starting and stopping server and future updates right in one app.
Method 2: Installing PostgreSQL via Homebrew
The second method is to use the Homebrew package manager. Let's get started and first launch your terminal and run the command below one by one. Update brew to get the latest package version from the source.
brew update
Run brew doctor to run diagnosis to check if there are any errors.
brew doctor
Install the latest version of PostgreSQL.
brew install postgresql
Starting the PostgreSQL server.
brew services start postgresql
If you want to stop then run the stop command.
brew services stop postgresql
Lastly, to view any running services run the services command.
brew services list
Do note that the command above installs the latest version of the database, if you want other versions you have to specify the version number. For example, if you want to install version 12 run the command like below.
brew install postgresql@12
Method 3: Installing PostgreSQL via Postgres.app
The 3rd method is to use Postgres.app and this application works just like DBngin but only has PostgreSQL database. It comes with a simple user interface and you can start, stop, restart, update and perform other actions with a click of a button. Do give it a look and if you are interested to try, just visit the homepage since it provides very straightforward installation guides.
Method 4: Installing PostgreSQL via Package Installer
The last method is to install it using the official package installer from PostgreSQL page. To get started just follow along with the installation wizard and you will have it installed in no time. It also comes with pgAdmin which is a database management tool that is quite handy to use. Official PostgreSQL download page By now you should have PostgreSQL installed on your macOS and if you come across any issue do start a new discussion below. Thanks for reading and if you find it helpful do share it with your friends.
Alaz
Week-end developer currently experimenting with web, mobile, and all things programming.


Leave a reply