In this post, you'll learn how to deploy Laravel 8 to production with Laravel Forge. So what is Laravel Forge? if you haven't already known, it's a service that helps to automate and manage the deployment process of PHP/Laravel projects. By default, Laravel Forge will provide all of the necessary tools for your website to run on production such as the latest version of PHP, Nginx, MySQL/PostgreSQL, and many others so let's get started.
Step 1: Register an Account
Visit Laravel Forge and do register an account. Do note that it's a paid service so you will have to be subscribed to use it after 7 days of trial.
Step 2: Create a Server
Next, let's create a new server from the dashboard, but keep in mind that you will have to add the provider. In this case, I have the Vultr and Hetzner Cloud ready to be used. In your case press any of the provider and connect it with the provider of your choice. Laravel Forge Create Server
Step 2.5: Add New Provider
Select the provider (VPS) that you want to associate with Laravel Forge. The details can be found in any of the provider dashboards. Laravel Forge Add New Provider
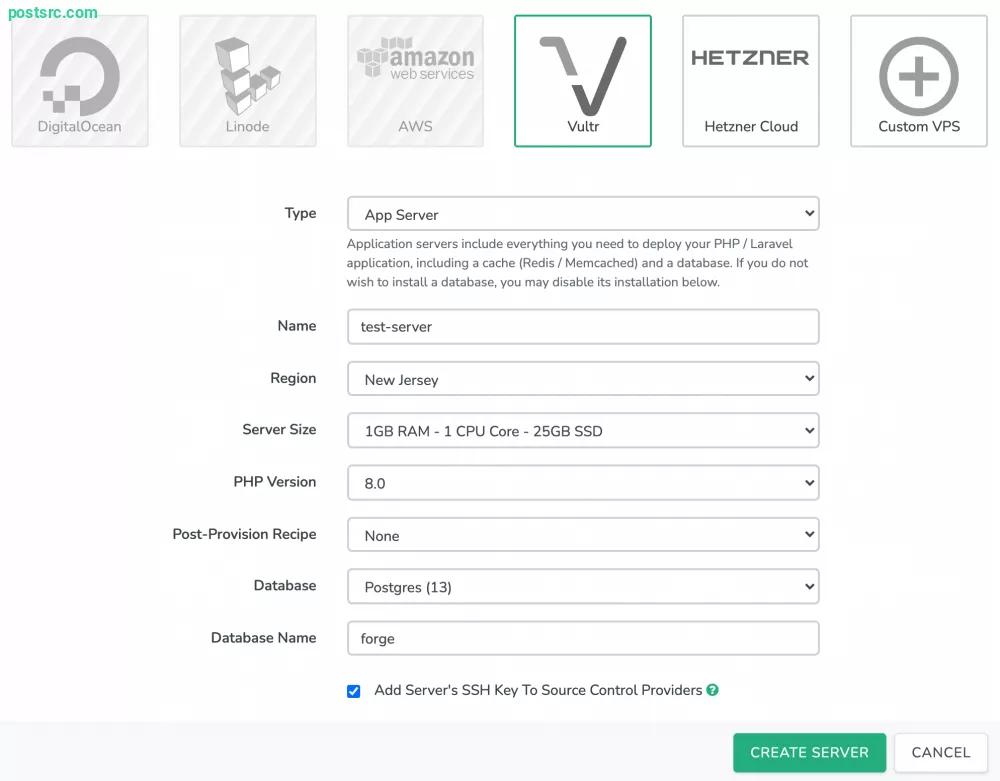
Step 3: Server Details
Once you have created the provider select the server and provide the server details. In my case, it will be Vultr and the details will be like below. Server size 1GB ram, PHP version 8, PostgreSQL 13 database and etc. Laravel Forge Server Details Keep in mind once you press the create server a modal will appear with the sudo password and database password. Keep it somewhere safe because you'll be needing it later.
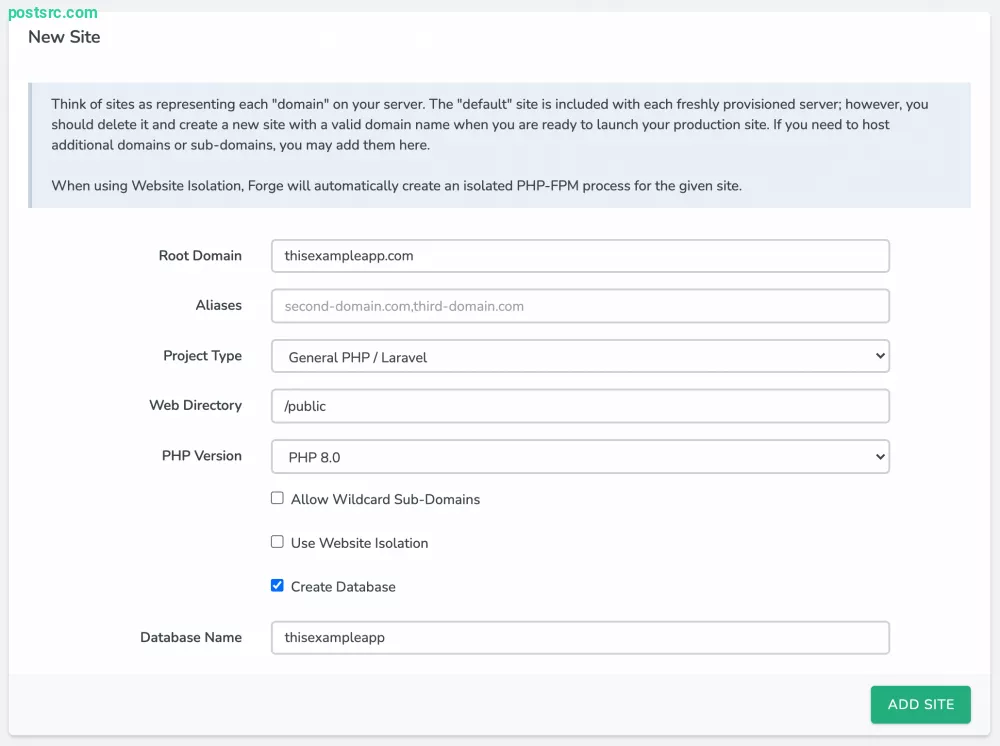
Wait until the server is done initializing. The setup typically runs for 5 to 10 minutes. Laravel Forge Initializing Server Now that the server is created you can create a new site. So the way how Laravel server works is that in a server you can create/add multiple websites. The important point to take into consideration is that when you have too many websites on a server the resource will have to share among each other so it's advised to have it balanced.
After you select git repository it will then ask you to install the repository. Once again fill in your details like below Laravel Forge Install Repository
Let Forge do the installation and once it's ready you will be able to see the website details. Once the installation is done, set up the Environment variable from the sidebar. Laravel Forge Site Environment Variable Once it's updated press the "Deploy Now" button once for it to deploy. It's recommended that "enable quick deploy" is activated but up to your use case it might be good to manually press the deploy now button when your updates is ready. Laravel Forge Successfully deployed website
Step 6: View in Browser
Now you should be able to view it on your browser by visiting the domain you have set. For this tutorial, I am using subdomain test.postsrc.com for the project. It might not be available by the time you visit but in your case, you will have to set up the domain DNS on your domain providerLaravel Forge Successfully Deploy Website Preview By now you will be able to deploy your Laravel project to Laravle Forge. If you need more tutorials like this just comment down below and if you find this tutorial to be helpful do share it with your friends. Have a good one cheers 🍻.
Alaz
Week-end developer currently experimenting with web, mobile, and all things programming.


Leave a reply