Posts Learn Components Snippets Categories Tags Tools About
/

How to Implement Laravel Livewire Infinite Pagination

Learn how to build Laravel Livewire infinite pagination to dynamically fetch data from the back-end with the help of cursor pagination for faster and efficient querying

2 years ago

14 mins read

6560 views

In this post, you'll learn how to implement an "infinite pagination" component in Laravel with the help of Livewire. The cursor pagination will be used to paginate the data for faster and efficient querying over your model. The steps are very simple so let's get started.
Laravel Livewire Infinite Pagination Example

Step 1: Install the Required Dependency


The dependency that you will need to have is "Laravel Livewire" and "TailwindCSS".
composer require livewire/livewire
For the TailwindCSS you can make use of the available CDN otherwise you can refer to the Installation Guide for more options.
<link href="https://unpkg.com/tailwindcss@^2/dist/tailwind.min.css" rel="stylesheet">

Full Base Layout Code


The full layout should be as follows. If you have an existing layout, do put the "@livewireStyles", "@livewireScripts" and "{{ $slot }}" on the necessary location.
// views/layouts/app.blade.php

<!DOCTYPE html>
<html class="h-full">
<head>
    <meta charset="utf-8">
    <meta name="viewport" content="width=device-width, initial-scale=1">
    <title>Laravel App</title>
    <link href="https://unpkg.com/tailwindcss@^2/dist/tailwind.min.css" rel="stylesheet">
    @livewireStyles
</head>
<body class="font-sans antialiased bg-gray-50 h-full">

    <main class="mt-12 min-h-full">
        {{ $slot }}
    </main>

    @livewireScripts
</body>
</html>

Step 2: Create "InfinitePostListing" Livewire Component


Now that you have the layout code ready in place, it's time to create a new "InfinitePostListing" Livewire component and you can use the command line to generate it.
php artisan livewire:make InfinitePostListing
Upon successfully creating the component you should see the command line output like below.
COMPONENT CREATED  🤙

CLASS: app/Http/Livewire/InfinitePostListing.php
VIEW:  resources/views/livewire/infinite-post-listing.blade.php

Step 3: Define the Route Endpoints


Before we start with the component logic, define the route in "routes/web.php" to provide the access endpoint.
# routes/web.php

Route::get('/infinite-posts', App\Http\Livewire\InfinitePostListing::class)
    ->name('posts.infinite-posts');

Step 4: - InfinitePostListing Livewire Component Logic


Inside the Livewire component, you'll need to define 3 methods:
  1. mount() - The lifecycle method to initialize the data 
  2. loadPosts() - The method to load more posts
  3. render() - The method to render the "views"
public function mount() {}

public function loadPosts() {}

public function render() {}
Other than that you will need to have 3 properties and they are the:
  1. $posts - To hold the posts data
  2. $nextCursor - to hold the next pagination cursor
  3. $hasMorePages - to determine whether there are more records
public $posts;

public $nextCursor;

public $hasMorePages;
The full code example will be as follows. Do note that Laravel Livewire component only accepts PHP "scalar types",  "Models" and "Collection" so other than those types, the component will throw out an error.
<?php

namespace App\Http\Livewire;

use App\Models\Post;
use Illuminate\Pagination\Cursor;
use Illuminate\Support\Collection;
use Livewire\Component;

class InfinitePostListing extends Component
{
    public $posts;

    public $nextCursor;

    public $hasMorePages;

    public function mount()
    {
        $this->posts = new Collection();

        $this->loadPosts();
    }

    public function loadPosts()
    {
        if ($this->hasMorePages !== null  && ! $this->hasMorePages) {
            return;
        }

        $posts = Post::cursorPaginate(12, ['*'], 'cursor', Cursor::fromEncoded($this->nextCursor));

        $this->posts->push(...$posts->items());

        if ($this->hasMorePages = $posts->hasMorePages()) {
            $this->nextCursor = $posts->nextCursor()->encode();
        }
    }

    public function render()
    {
        return view('livewire.infinite-post-listing')->layout('layouts.base');
    }
}

So a little bit explanation of the code above, there's 5 important flow that you have to know.
  1. When the component is loaded, the "mount()" method will be triggered and the "posts" property is initialized with an empty Laravel Collection.
  2. Then the "loadPosts()" method is triggered to load the "posts" that are retrieved by the "cursorPaginate" method.
  3. The pagination will be determined by the "nextCursor" property which is encoded and decoded every time the "loadPosts" method is called.
  4. The retrieved data is "pushed" to the "posts" collection.
  5. Finally, the "render()" method renders the view for the user to see.

Step 5: InfinitePostListing Views


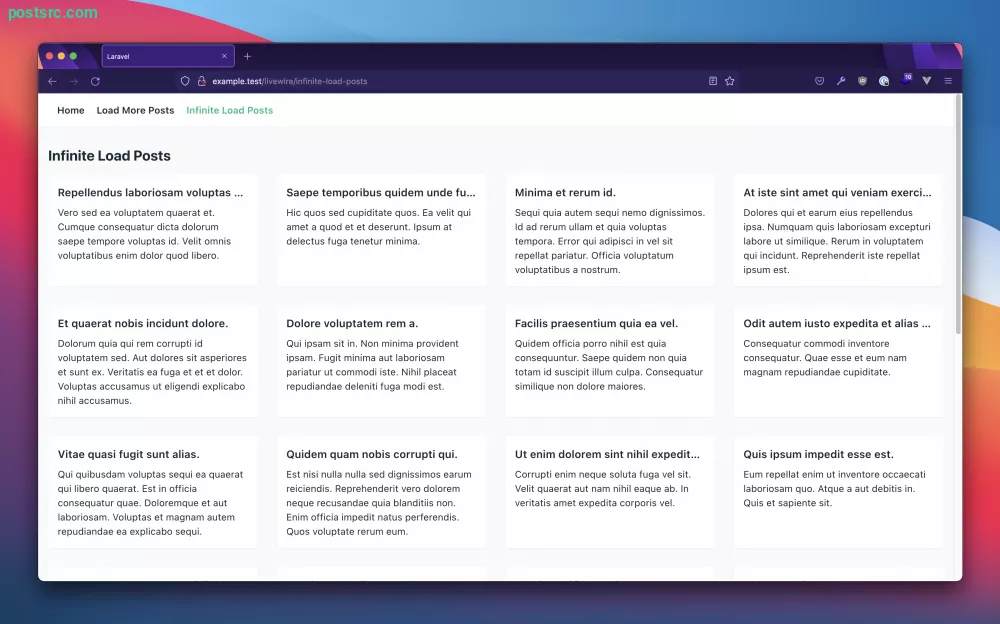
The views will loop through the "posts" properties and for this example, simple styling is applied with "TailwindCSS" classes. Assuming the "Post" model has a "title" and "body" column, you can access it as you normally would in Laravel Blade file.
Infinite Load Posts

The code for the views will be as follows. Do note that we are including the "skeleton" loading component to show that the post is being loaded when scrolling to the bottom of the page.
<!-- /resources/views/livewire/infinite-post-listing.blade.php -->

<div class="container p-4 mx-auto">
    <h1 class="font-semibold text-2xl font-bold text-gray-800">Infinite Load Posts</h1>

    <div class="grid grid-cols-1 md:grid-cols-2 lg:grid-cols-4 gap-8 mt-4">
        @foreach($posts as $post)
            <a href="#" class="block p-4 bg-white rounded shadow-sm hover:shadow overflow-hidden" :key="$post['id']">
                <h2 class="truncate font-semibold text-lg text-gray-800">
                    {{ $post['title'] }}
                </h2>

                <p class="mt-2 text-gray-800">
                    {{ $post['body'] }}
                </p>
            </a>
        @endforeach
    </div>

    @if($hasMorePages)
        <div
            x-data="{
                init () {
                    let observer = new IntersectionObserver((entries) => {
                        entries.forEach(entry => {
                            if (entry.isIntersecting) {
                                @this.call('loadPosts')
                            }
                        })
                    }, {
                        root: null
                    });
                    observer.observe(this.$el);
                }
            }"
            class="grid grid-cols-1 md:grid-cols-2 lg:grid-cols-4 gap-8 mt-4"
        >
            @foreach(range(1, 4) as $x)
                @include('partials.skeleton')
            @endforeach
        </div>
    @endif
</div>
The skeleton component can be as simple as below.
<!-- partials/skeleton.blade.php -->

<div class="mt-4 p-4 w-full mx-auto bg-white dark:bg-gray-800 border border-gray-200 dark:border-gray-800 shadow-sm rounded-md">
    <div class="animate-pulse flex space-x-4">
        <div class="flex-1 space-y-4 py-1">
            <div class="h-4 bg-gray-200 dark:bg-gray-700 rounded w-3/4"></div>
            <div class="space-y-2">
                <div class="h-4 bg-gray-200 dark:bg-gray-700 rounded"></div>
                <div class="h-4 bg-gray-200 dark:bg-gray-700 rounded w-5/6"></div>
                <div class="h-4 bg-gray-200 dark:bg-gray-700 rounded w-5/6"></div>
            </div>
        </div>
    </div>
</div>

Skeleton Component

Now when you scroll to the end of the page you will see the skeleton component and within a split second the next posts will be loaded.
Update: You can make use of Alpine Intersect Plugin to replace the Intersection Observable above to simplify the whole code.
@if($hasMoreData)
    <div
        x-data
        x-intersect="@this.call('loadMoreData')"
        class="grid grid-cols-1 md:grid-cols-2 lg:grid-cols-4 gap-x-4"
    >
        @foreach(range(1, 4) as $x)
            @include('partials.skeleton')
        @endforeach
    </div>
@endif
By now you should be able to implement Laravel Livewire Infinite pagination and If you found this tutorial to be helpful, do share it with your friends, cheers and happy coding 🍻. 

Related Posts

Alternative Tags

If you like our tutorial, do make sure to support us by being our Patreon or buy us some coffee ☕️

new

PostSrc Code Snippets

Learn new snippets today, level up your Laravel, Alpine JS, Vue JS, Tailwind CSS skills and more.

Learn New Snippets

Sponsors 👑

+ Add Yours
new

PostSrc Code Components

Collection of Tailwind CSS components for everyone to use. Browse all of the components that are right for your project.

View Components
)